Skip to content

šŸ“ Blog

Golo - Little 5

Ok! That’s time to sync everyone on the state of GoloHttpServer.
First of all, I created a GitHub for this and you’re more than welcome to contribute, ask questions or even just talk about it.

This will allow you to take a look at the implementation of the run function which handle the Http request and response.

function run = |connectedClient, serverState| {

  let inFromClient = BufferedReader( InputStreamReader (connectedClient:getInputStream()))
  let outToClient = DataOutputStream(connectedClient:getOutputStream())

  let requestString = inFromClient:readLine()
  let headerLine = requestString

  let tokenizer = StringTokenizer(headerLine)
  let httpMethod = tokenizer:nextToken()
  let httpQueryString = tokenizer:nextToken()
  let responseBuffer = StringBuffer()
  responseBuffer:append("<b> This is the HTTP Server Home Page.... </b><BR>")
    responseBuffer:append("The HTTP Client request is ....<BR>")

    while (inFromClient:ready()) {
        # Read the HTTP complete HTTP Query
        responseBuffer:append(requestString + "<BR>")
      requestString = inFromClient:readLine()
  }

  httpMethodHandle(httpMethod, httpQueryString, responseBuffer, outToClient)
}

As you can see, I lied a bit: the run function is just here to prepare all the needed element to delegate to httpMethodHandle.
The input and output buffers are initialized, the query is tokenized and everything is set to httpMethodHandle function.

function httpMethodHandle = |methodName, queryString, responseBuffer, outToClient| {
  case {
      when methodName == "GET" {
          var fileName = queryString:replaceFirst("/", "")
          if (queryString=="/") {
              # The default home page
              fileName = Parameters(): HOME()   
          }
          fileName = URLDecoder.decode(fileName)
          if ( File(fileName):isFile()){                              
              sendResponse(200, fileName, true, outToClient)
          } else {
              sendResponse(404, "<b>The Requested resource not found ...." + "Usage: http://127.0.0.1:5000 or http://127.0.0.1:5000/<fileName></b>", false, outToClient)
          }    
      }
      otherwise {
          sendResponse(404, "<b>The Requested resource not found ...." + "Usage: http://127.0.0.1:5000 or http://127.0.0.1:5000/<fileName></b>", false, outToClient)
          }
      }
}

This method has a simple goal: analyze the resource name asked and return the appropriate content.
Note the use of case..when..otherwise Golo statements.
This is quite useful isn’t it ?

From here, I’ll try to use GoloHttpServer for side projects.
For example, during MixIT 2013, I attended a conference on the Dart language.
Serve HTML pages and javascripts ? That may be doable with GoloHttpServer ;)

As usual, I’m waiting your emails and comments.
Don’t be shy and drop me an email as the other little hackers that prefers that to public comment! As of today, everyone had my answers ;)
Why? Oh Why?

For 2 days, it’s MixIT 2013 days!
This conference has a lot of qualities, but for me, it’s THE event that helped me surviving previous years.

This may sound a bit too much, but believe me: I was and still am a true geek!
I like technology, I like computers, I like science… and I like to share!
But when you work in a company that prevent you from any innovation, where every technical act is surrounded by political thoughts, you’re stucked.
Being stucked in your brain is not a very pleasant situation…

Going to MixIT was a break in those sad moments, this place was full of people with knowledge and the will to share.
There were hard moments when people were laughing on old technologies and working methods: this was my daily tools and environment!
But this was the opportunity to meet and exchange ideas with passionnate peoples.
After the first MixIT, I stopped trying to push Groovy in the product I was working on: instead, I just had to do it :)
After the second year, I decided to look for a new job: I found one in the month after!

Yes, MixIT is brighter, stronger and clean your clothes better! ;)

This year is even better: I love my job, I love my company and I even use some of technologies shown here as innovatives ;)

So, thanks MixIT, thanks all the people behind this event!
Long live to MixIT!

PiG 2 - First Interaction

In my previous article I explained some steps useful for my Little Experiment with my Raspy.
Yes, I gave it a name, I’m stupid and geek ;)

This time I’ll explain my first usage of Golo to control the GPIO of my Raspy.
If you didn’t prepared your Raspy for Golo usage, just follow my article.
All those previous articles looks like I prepared something ? ;)

When you have the hardware and software ready, we can jump on the next step: light a LED! ;)

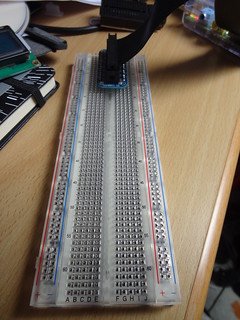
First, connect the cobbler breakout to the Raspy and the breadboard.
It will allow multiple future experiments without more soldering.

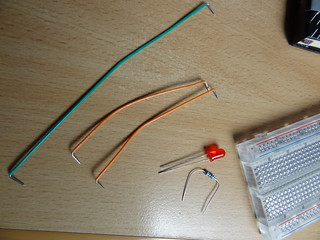
The long boardBoard and cable

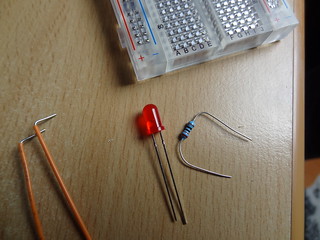
Prepare a LED. I chose a red one, some K2000 reminiscence ;)
The resistor is here to limit the current allowed through the LED.
If you want further explanation on this, you can read Gordons projects page or the Pi4J corresponding page.

hardware for first projectclose view of LED and resistor

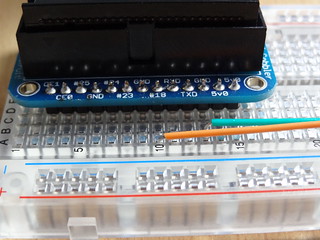
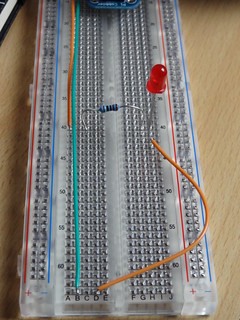
Start by pinning an orange cable to pin marked #18. It is the GPIO1 pin.
Use then a green cable to pin the GND pin.

Orange on pin #18, Green on GND

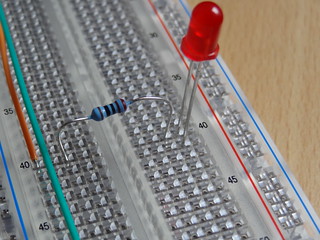
Put a resistor and then a LED:

put the resistor and the LED

Don’t forget to close the circuit:

close the circuit

From now, you have everything to run the first sample from the Pi4J project.
First, follow their instructions to download and setup the library
Check that the control sample in Java is working.

If you saw the LED switching on and off, you’re just one step ahead of this article goal.
You have the hardware, you have the Java sofware.

But wait… where’s the Golo software ? :)

Oh, look! Here!

module PiG.gpio.control

# adapted from http:#pi4j.com/example/control.html
# which is
# Copyright (C) 2012 - 2013 Pi4J
# Licensed under the Apache License, Version 2.0 (the "License")
#
# Golo version by Thierry Chantier
# Copyright (C) 2013 Pi4J
# Licensed under the Apache License, Version 2.0 (the "License")

import com.pi4j.io.gpio.GpioController
import com.pi4j.io.gpio.GpioFactory
import com.pi4j.io.gpio.GpioPinDigitalOutput
import com.pi4j.io.gpio.PinState
import com.pi4j.io.gpio.RaspiPin

import java.lang.Thread

#
# This example code demonstrates how to perform simple state
# control of a GPIO pin on the Raspberry Pi.
#
# @author Robert Savage (original java version)
# @author Thierry Chantier (Golo-lang version)
#

function main = |args| {

        println("<--Pi4J--> GPIO Control Example ... started.")

        # create gpio controller
        let gpioInstance = GpioFactory.getInstance()

        # provision gpio pin #01 as an output pin and turn on
        let pin = gpioInstance: provisionDigitalOutputPin(RaspiPin.GPIO_01(), "MyLED", PinState.HIGH())
        println("--> GPIO state should be: ON")

        Thread.sleep(15000_L)

        # turn off gpio pin #01
        pin: low()
        println("--> GPIO state should be: OFF")

        Thread.sleep(1000_L)

        # toggle the current state of gpio pin #01 (should turn on)
        pin: toggle()
        println("--> GPIO state should be: ON")

        Thread.sleep(15000_L)

        # toggle the current state of gpio pin #01  (should turn off)
        pin: toggle()
        println("--> GPIO state should be: OFF")

        Thread.sleep(5000_L)

        # turn on gpio pin #01 for 1 second and then off
        println("--> GPIO state should be: ON for only 1 second")
        # set second argument to 'true' use a blocking call
        let duration = 1000_L
        pin: pulse(duration: longValue(), true)

        # stop all GPIO activity/threads by shutting down the GPIO controller
        # (this method will forcefully shutdown all GPIO monitoring threads and scheduled tasks)
        gpioInstance: shutdown()
}

My project is now going well. I’m starting to convert to Golo every sample from Pi4J and give them back as a contribution.
I hoped to have enough time to show a full video of all the process, but it was quicker to do this article.

If you have any question, feel free to comment or to drop me an email.

PiG 1 - Soldering Iron Step

so what ? You started the GoloHttpServer, showed something on Raspberry and… nothing ?
Yeah, I know. But c’mon, I still need some sleep and still don’t have 72h days ;)

Last week end, I started the next step in the Little Hardware meets Little Software. yep, I bring back on the desk my soldering iron!

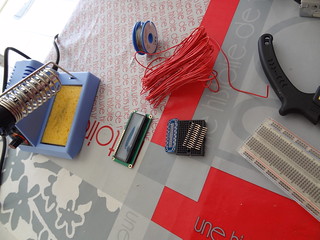
I had to prepare several items:

So everything is in place.

Everything ready!

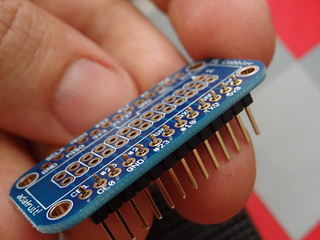
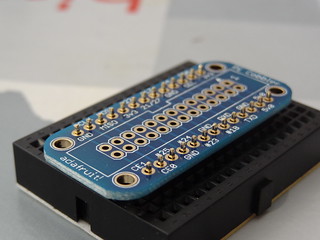
Let’s start by puting the header pins in the cobbler PCB.

cobbler PCB and header pins

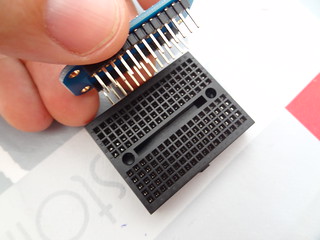
To have something stable, you can use a small breadboard and slot the header pin in it.

use a breadboard to stabilize during solderinguse a breadboard to stabilize during soldering

I didn’t work with a soldering iron for several years… not too bad :)

not that bad after all those years without soldering ;)

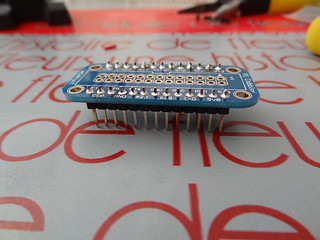
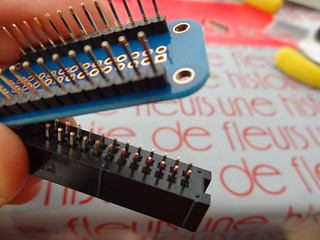
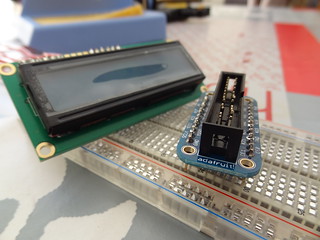
Don’t forget the ribbon cable socket:

ribbon cable socket

At that point, the cobbler breakout is ready.
Now it’s time to put some wires on the HD44780.

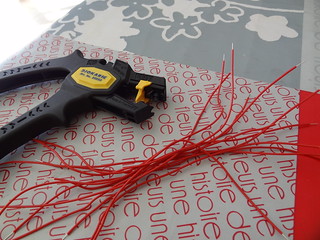
The wire stripper is my best friend when there’s a lot of wire to prepare:

prepare your wires

A third hand tool is very helpful to solder the wire to the LCD panel.

use a third hand!

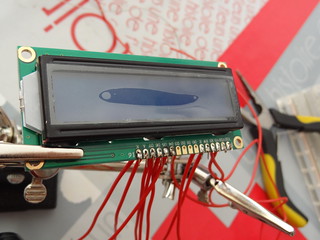
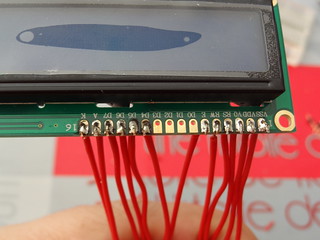
You have to wire pin 1 to 6, then 11 to 16:

1 to 6, then 11 to 16

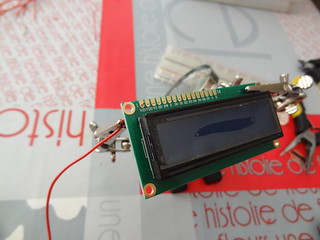
The LCD has now wires. It could be better and I wonder if I won’t try to solder head pins on another LCD:

could be better

Here we go!

Here we go!

At the end, I have now everything to start to work with my Pi!
The next step has already started and I’m running basic piece of code to test the cobbler, the Gpio…
The Gpio and its wonderful pin numbering, guided by a logic that only an advanced Scala user may understand ;)

See you soon, with pieces of Golo lang to interact with a small red led on a board :)

Golo on the Raspberry

On the Little experiments desk, there are a lot of Little hardware.
I must admit I have some favorites among them, but don’t tell them ;)

One of them is an Android USB key, MK808B, which allows me to run Android any TV with a HDMI input.
Used with a bluetooth PlayStation keyboard, it’s pure fun.
Unfortunately, Android devices are running a modified JVM called Dalvik which has one major drawback: it’s based on code without invokeDynamic.

What does it mean ?
It means a awful thing: Golo won’t run on it!
I read some work from JĆ©rĆ“me Pilliet about implementing JSR 292 on Dalvik, but it’s a work in progress with no garantee.

So, let it go…
But wait, there’s a second device I really enjoy: my RaspBerry Pi!

In a previous experiment, I ran a Tomcat server on it, so at least Java is running.
And, better than a painful experiment, Golo website itself provides instructions on setting up a running Pi Golo :)
It was for me the opportunity to try also ArchLinux.

The only issue I had was that the root user is unable to log directly on the device: you must connect through SSH, which means knowing the IP address.

I add the modified bin/* files for those who wants them quickly.

Now let’s back to work and see if one of my recent dream may come true: use the Raspberry GPIO to control a HD44780U LCD with Golo.
I know… silly… and I have to publish follow up on the GoloHttpServer… I know ;)

Enjoy your PI Golo!